
AWS Nodes
— What do we mean by “AWS EC2 Node and Provisioning a VM for use as a Jenkins agent”?
Jenkins controllers delegate execution of jobs to agents, but technically, we can execute jobs on controllers themselves which would take away resources from our controllers, Jenkins performance would be impacted, and this is not Best Practice; agents can be just about any flavor (i.e. local (on-prem, bare metal hardware)), Windows, Linux), but in this discussion we will utilize AWS EC2.
— Why should we choose “AWS”?
From AWS, “AWS enables you to select the operating system, programming language, web application platform, database, and other services you need. With AWS, you receive: Easy to use, Flexible, Cost-Effective, Reliable, Scalable and high-performance, Secure”. From our perspective, AWS provides convenience, low cost, reliability, scalability, security, and support for a plethora of applications and configurations where there’s little need to maintain hardware (including dedicated space, cooling etc.), purchase software, implement processes to enhance performance etc.
— How do we create a node with Amazon Web Service (AWS)?
- Obtain an AWS Virtual Private Cloud (VPC), but signing up for AWS as an individual, or reach out to IT/Networking team if you are with a organization/corporate entity
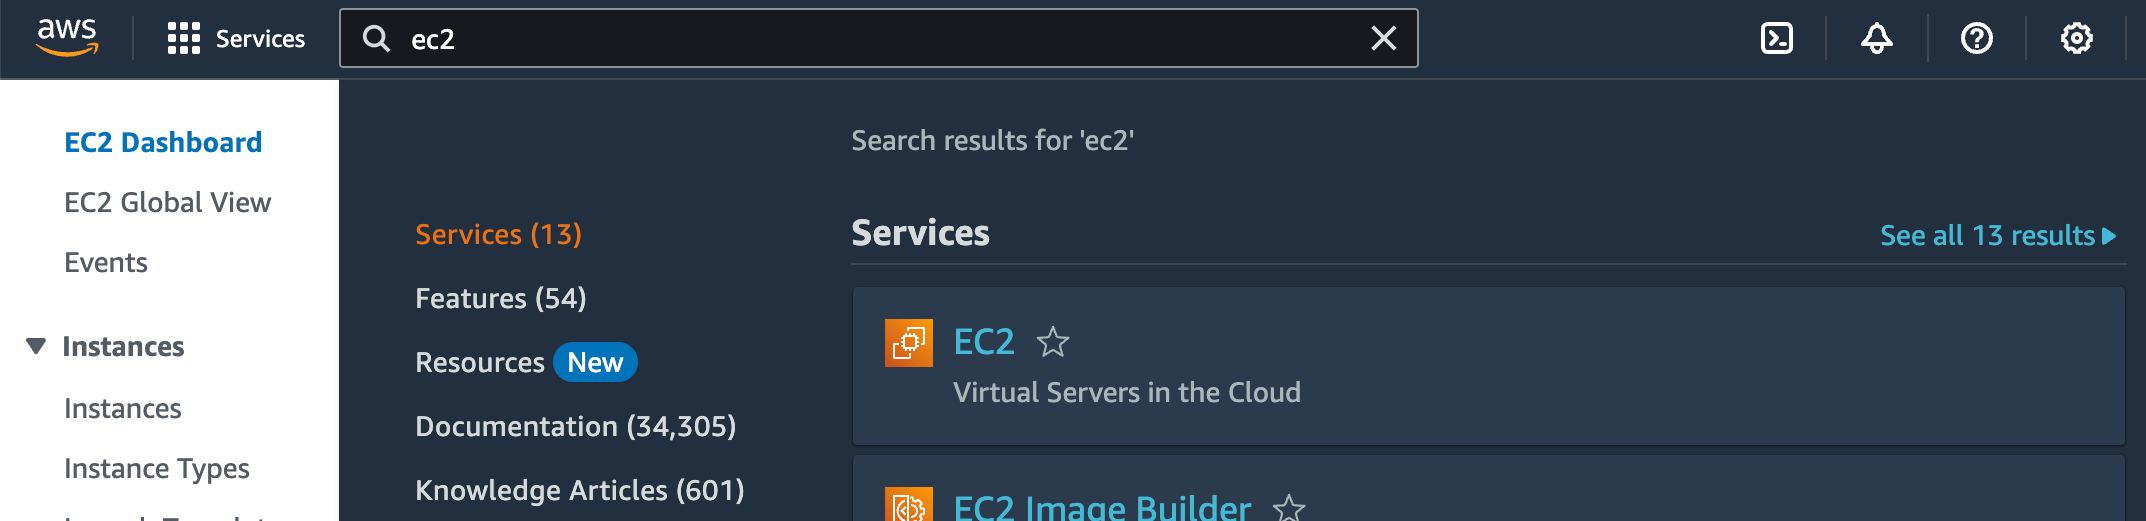
- Log into AWS
- In the search field, type EC2 then Enter key
- Click on EC2 which will take you to the EC2 dashboard
- Click on Launch Instance which will take you to Launch an Instance
- Enter a name for the instance (e.g. myjenkinsagent)
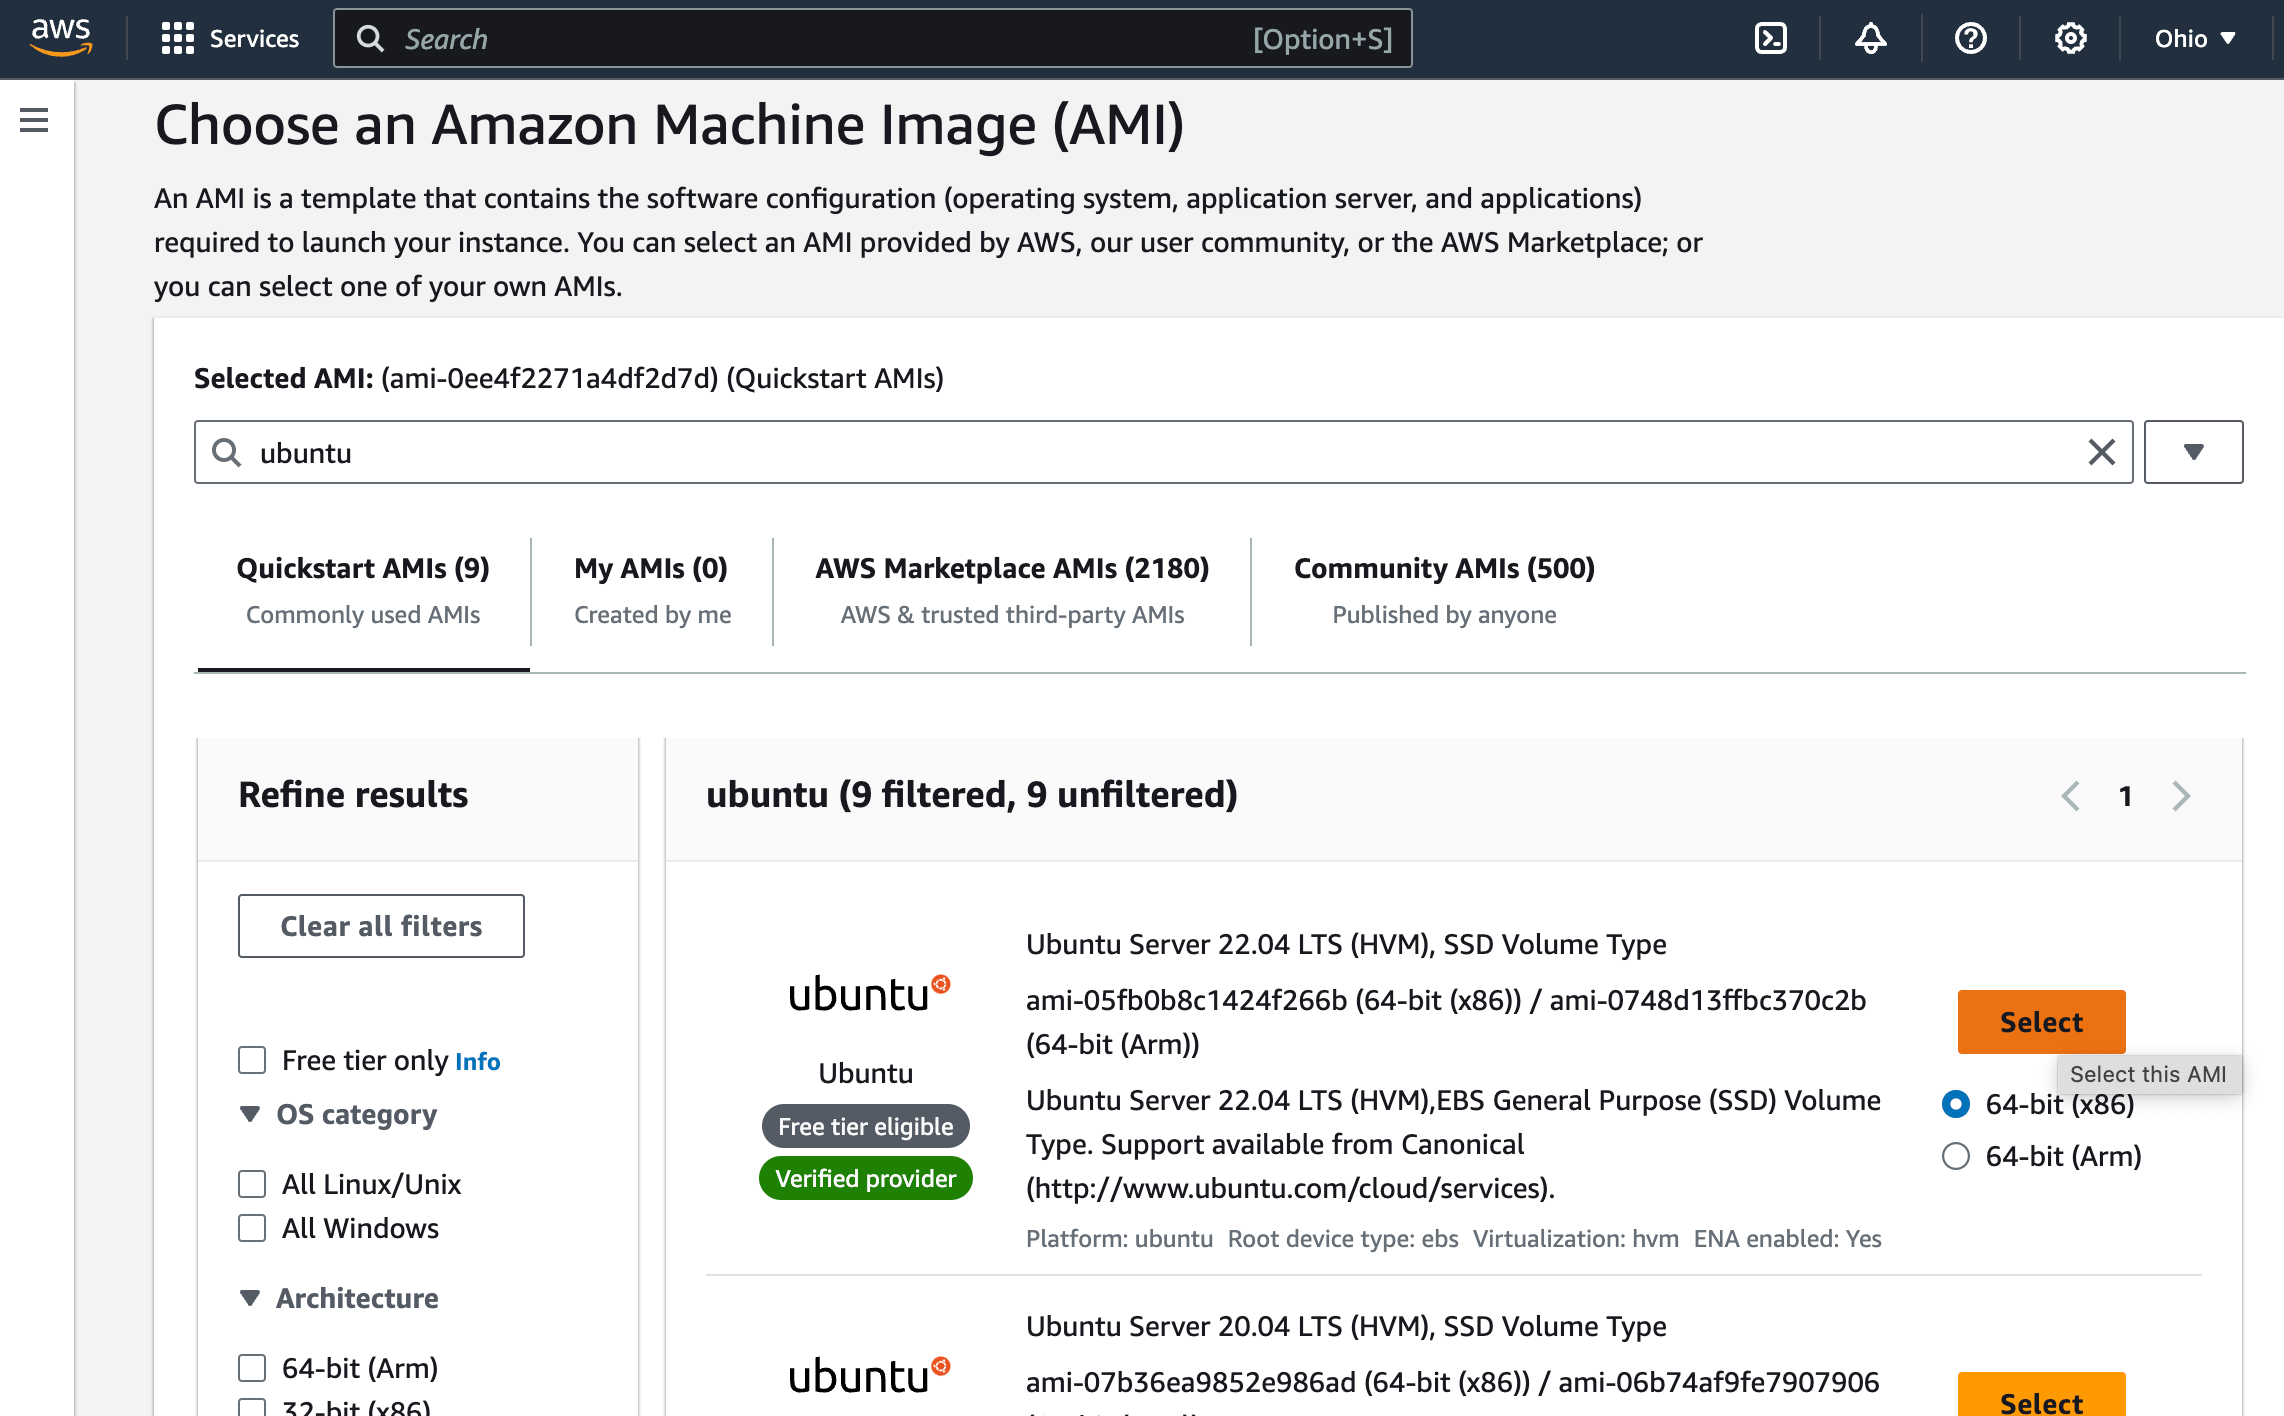
- Enter and select Application and OS Images (AMI)
- For example, enter Ubuntu and select a flavor (e.g. Ubuntu Server 22.04 LTS (HVM), SSD Volume Type – ami-05fb0b8c1424f266b (64-bit (x86)) / ami-0748d13ffbc370c2b (64-bit (Arm)))
- Select an Instance Type
- For example: “t2.micro”
- For “Key pair (login),” click on “Create new key pair”
- Enter a name for the key pair
- For example: mykey
- Confirm the key pair type and private key format. Update as necessary (e.g. we use “rsa” and .pem)
- Click on “Create key pair,” and in doing the aforemented, a private was downloaded to our node (e.g.mykey.pem)
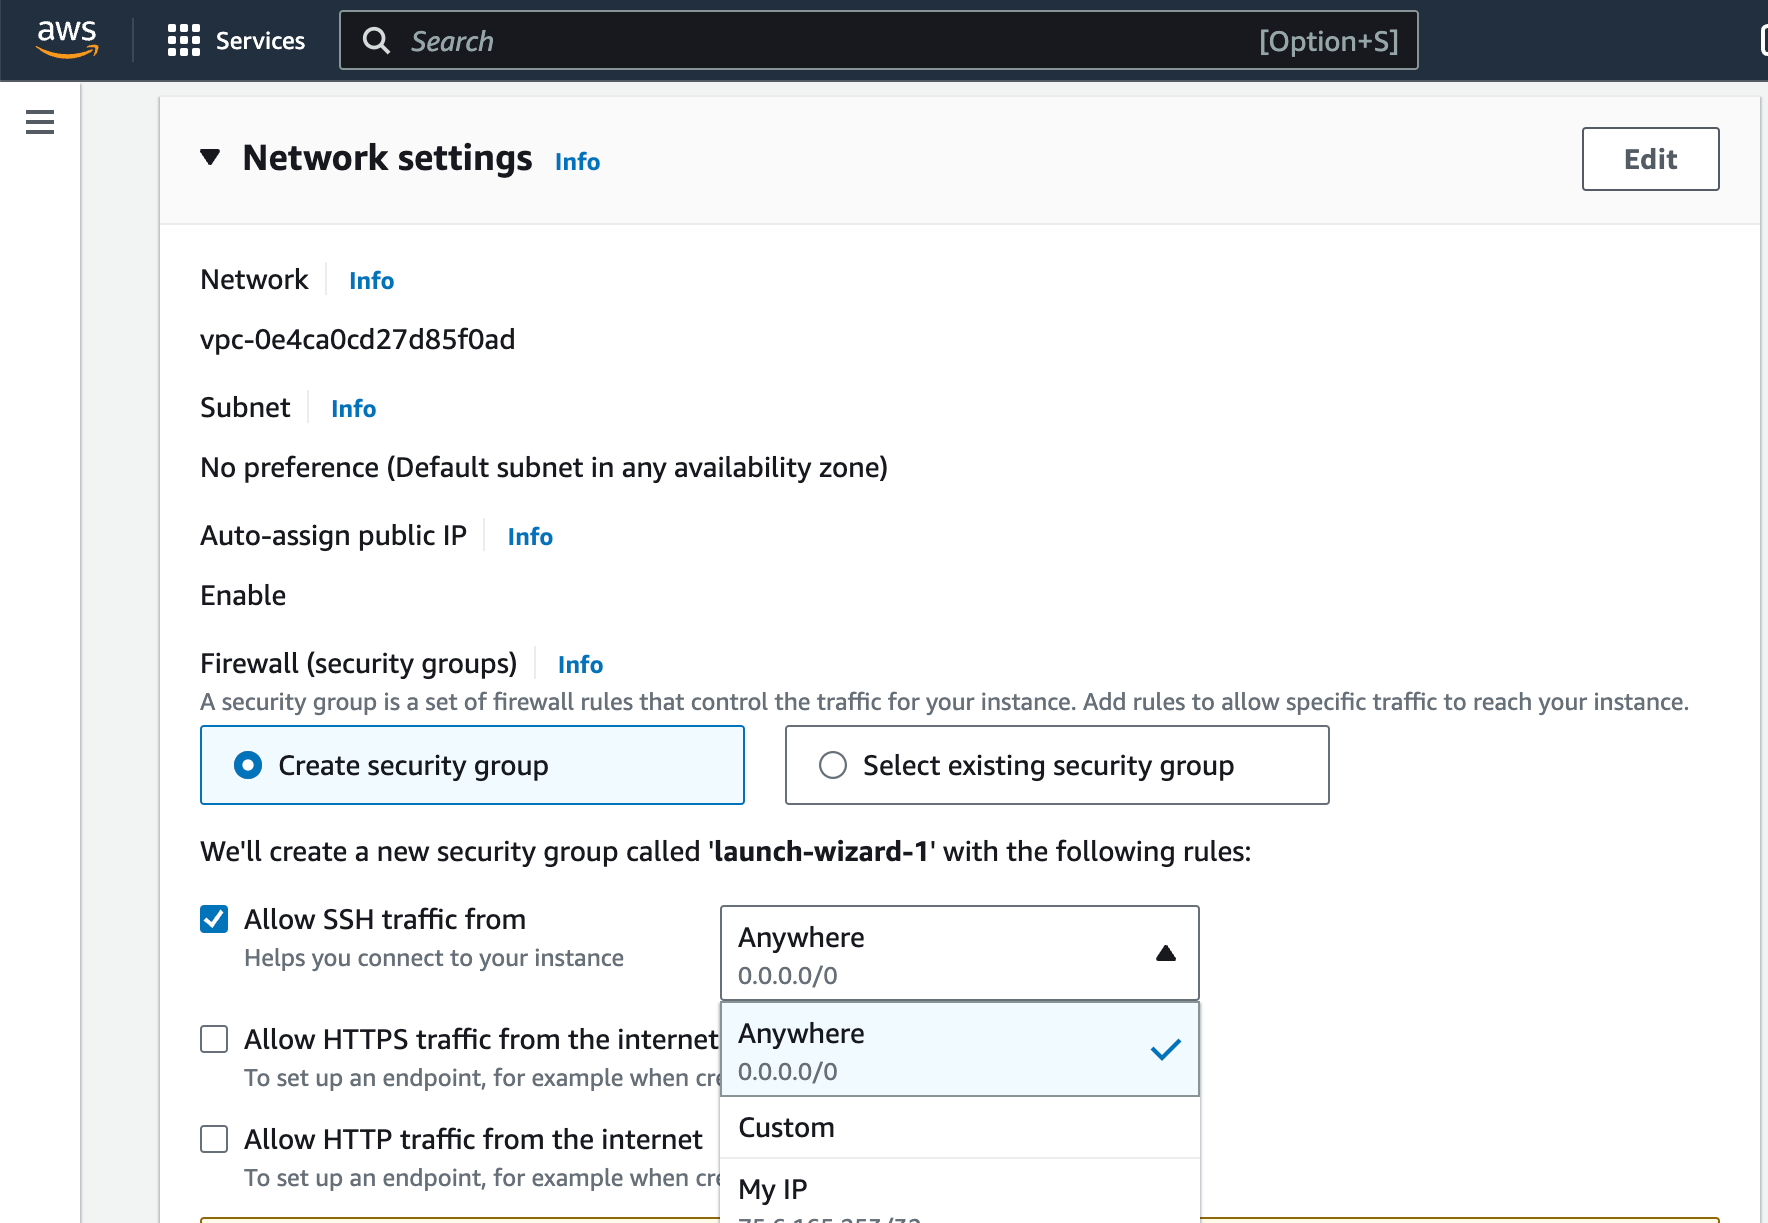
- For Network Settings, select “Create security group”
- Select “Allow SSH traffic from” and select “My IP” from the dropdown menu (AWS show know our IP from the node you logged into AWS). As we are spinning up a node for use as a Jenkins agent, make sure that on AWS incoming traffic (ingress), port 22 is open so that Jenkins can connect to the node via SSH. You can open everything (e.g. CIDR=0.0.0.0/0) which should used sparingly to debug; we should be isolating AWS to our nodes to our IPs to mitigate others from accessing our AWS instances.
- Configure storage as you see fit (e.g. 8 GiB, gp3)
- Click on Launch Instance
- Enter a name for the key pair
- From the EC2 Dashboard, our new instance should be “running“
Note: As best practice, we would want to create an image (a custom AMI) of our instance so that we may readily spin up additional nodes with similar configurations, destroy and re-created instances in the event of lock-outs/expired accounts/corruptions/compromised instances; our AMIs should also include our applications, libraries, packages etc.
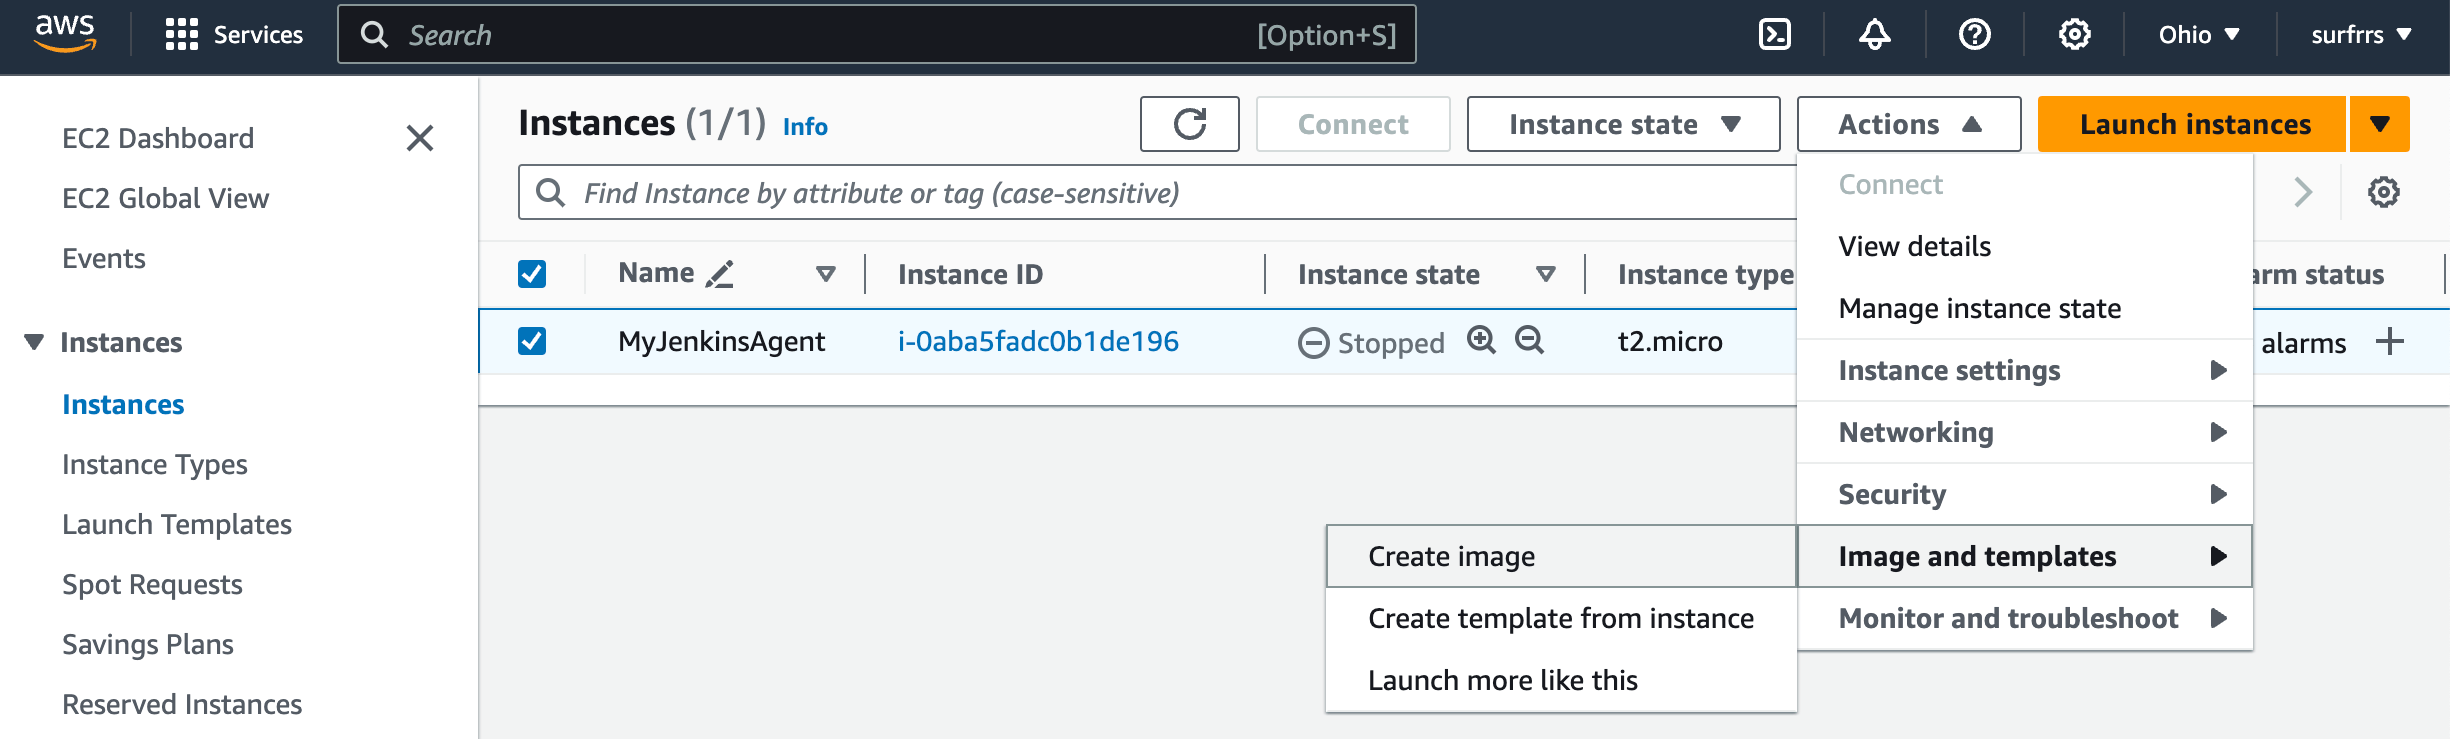
- From the EC2 Dashboard, select our node then click on Actions->Image and templates->Create image.
— How do we configure nodes and install apps?
Configuring Nodes and installing Apps
— How do we provision a node for use as a Jenkins agent?
Jenkins Agent – attaching an AWS node
— How do we automate provisioning of nodes?
Automation – Python, Terraform


Leave a comment