Utilizing a microservices architecture and isolating your apps into containers will provide portability, enhanced security, a backup and recovery strategy
Task-driven Computing
- Secured connection using Asymmetric encryption
- Enabling ephemeral agents for processing requests
- Are you able to recover from a breach? Quickly restore systems with minimal operational disruptions and minimizing data loss
Bare Metal Servers vs. VM
- Baremetal, dedicated hardware? Offers maximum and consistent performance, security and control. Best for heavy databases/high-performance computing
- Using VM? Offers unmatched flexibility, scalability, and cost-efficiency. Best for Web Apps, Development and general cloud use
— What do we mean by Ephemeral Agents?
Ephemeral Agents are on-demand compute systems– more secured as their footprints are limited (e.g. time-based), financially efficiency rotating credentials, sandboxes and staging servers for development and testing
— Why should we use Ephemeral Agents?
- Secured Executor
- Expunged attack surface
- Reduced cost
— How do we create Ephemeral Agents?
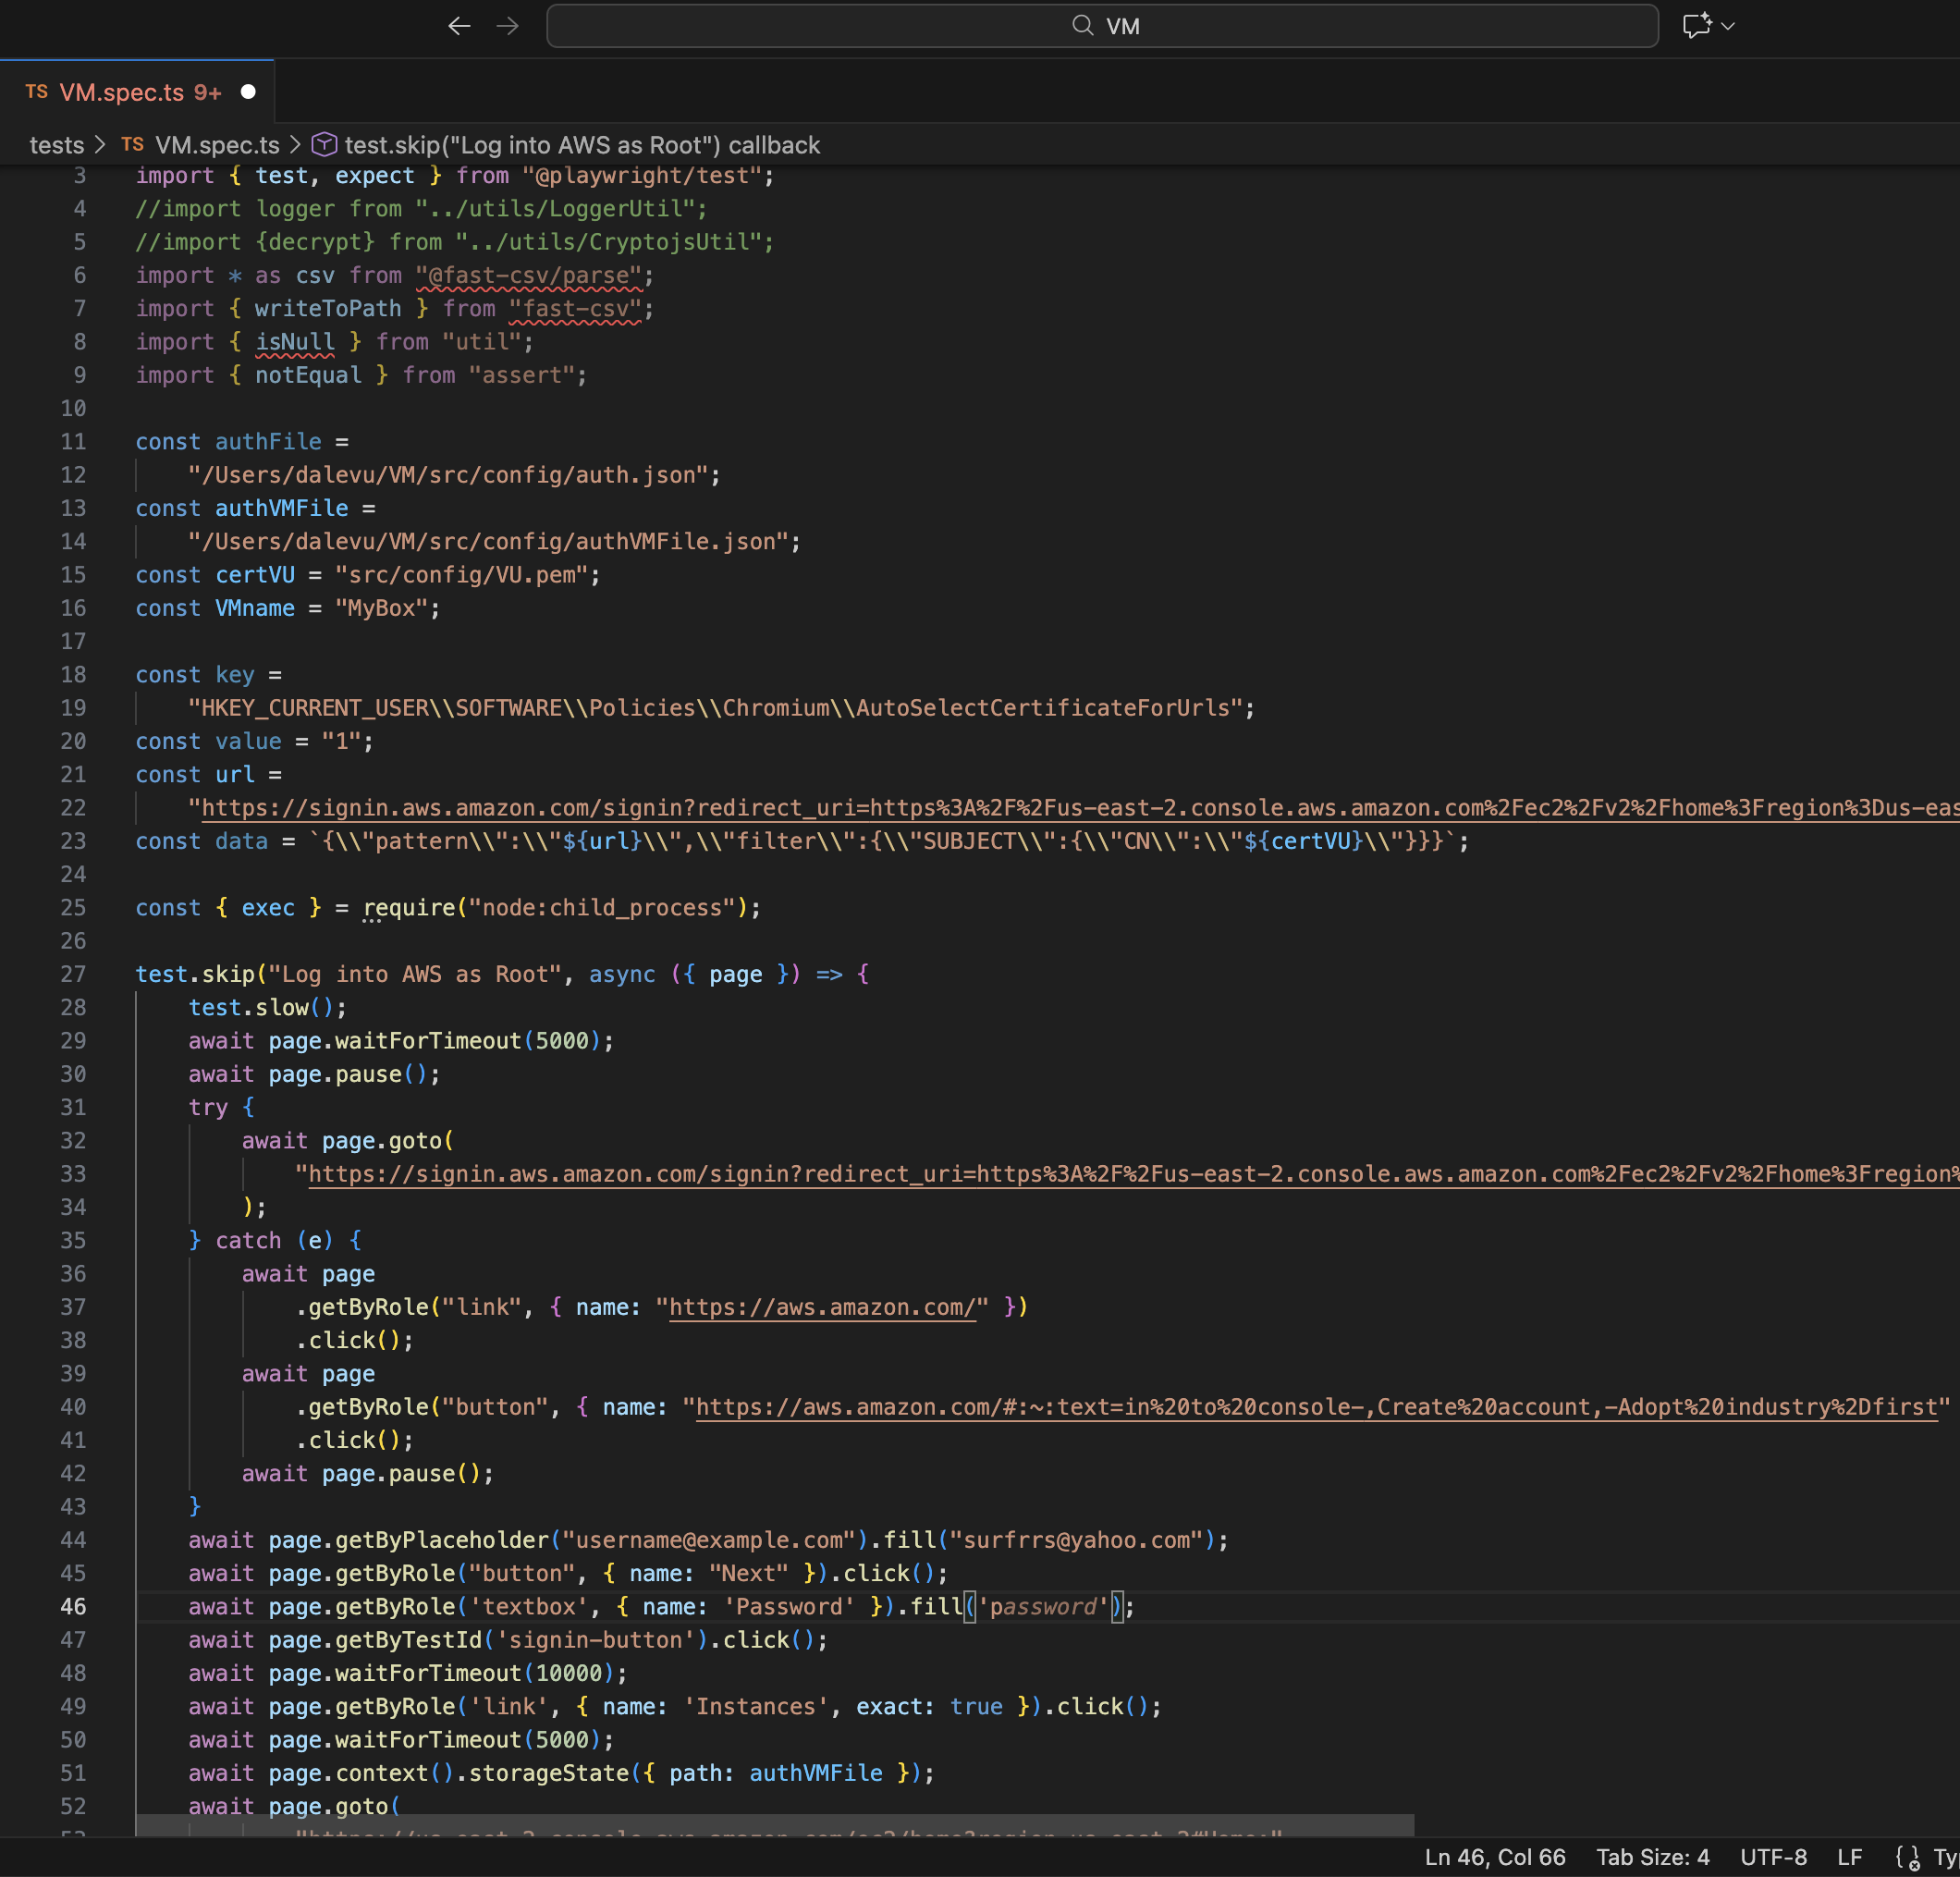
Pre-requisite: It is assumed you have an AWS account, provisioning automation (in this example, we are using a QA tool-Playwright but Terraform is another option and topic for another day), Asymmetric encryption-key-pair, Security group- Ingress/Egress policy
- Log into AWS (e.g. we are using a Yubikey for multi-factor authentication)
- Goto EC2
- Select Launch an Instance
- Create your VM instance:
- Enter a Name- doesn’t have to be unique
- Select an OS AMI- the image should be secured and may include vetted libraries (e.g. your company may have approved AMI images pushed to AWS)
- Select an Instance type (e.g. t3-micro)
- Select or Create a Key-pair (e.g. we’ll use an AWS generated one for this example)
- Select or Create a Security Group (e.g. our example will be open to/from anywhere, but DO NOT do that in your production environment)
- Select the storage capacity
- Launch your instance
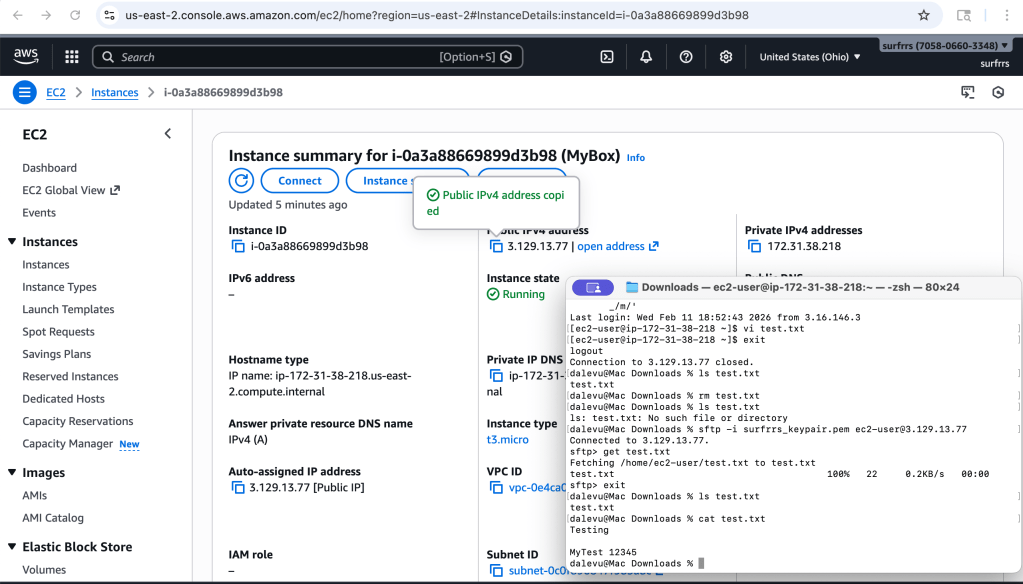
- Connect to your instance
- Optional: create a user, push your public key, install packages/libraries etc
- SSH into the VM using your Asymmetric key-pair (which was generated in AWS or you could use a key-pair generated by you- topic for another day)
- Once we are done with using this agent, we will tear it down which removed it’s footprint and secures the image. We can choose to create/update the image to persist configuration changes. We will utilize automation to spin up another agent as needed
Optional, automate provisioning of VMs which can be Dockerized as well:
- Install our Development environment
- Programing Language: for Example, Install Python on MacOS (it is assumed brew exists). On MacOS, you may already have a version of python which you can check with the command=”python –version”
- Run command, brew install python (note: pip is also installed)
- Development IDE: for example, Visual Studio
- Download and install Visual Studio
- Programing Language: for Example, Install Python on MacOS (it is assumed brew exists). On MacOS, you may already have a version of python which you can check with the command=”python –version”
- Install libraries and packages that you will utilize for developing our automation tests
- For example: we will develop tests to check Jenkins
- Run command, pip install selenium
- Run command, pip install unittest
- For example: we will develop tests to check Jenkins
- Write your automation.
- For example: create our procedures
- Create your VM
- For example, you should get the following results— showing you have access to your instance
- Run Docker command, <tbd>


Leave a comment